Send e-mails from Azure Data Factory with Azure Logic App
- Eric Rouach
- Apr 27, 2022
- 4 min read
(Part 3/3 of “Getting started with Azure Data Factory”)

Author: Eric Rouach, DBA at Madeira Data Solutions
Date: April 2022
In this demo, I’ll show you how to use an Azure Logic App to alert on an ADF pipeline failure by sending an e-mail.
Pre-requisites:
-An Azure subscription
-An Azure SQL Server
-An Azure SQL database
-An Azure Data Factory
-Completion of parts 1 and 2 of “Getting started with Azure Data Factory”:
Use case:
Our use-case is quite simple: we’ll create a test table in our Azure SQL database and use an ADF pipeline to execute a stored procedure that inserts a row into the test table. Our goal is to create an alert in case of ADF pipeline run failure by calling a Logic App.
Let’s get started!
At this point, let’s assume you have already logged into your Azure SQL Server using SSMS:

Open a new query window using one of the existing databases and create a test table by running the following query:

Now, create a simple stored procedure that will generate an error when executed:

Obviously, the attempt of inserting a NULL value into the not nullable column “AnyText” will fail the stored procedure execution.
Open your ADF studio and select the Author icon:

Create a new pipeline:

Rename it with a meaningful name and close the properties window:

From the Activities pane, under General, drag a Stored Procedure activity to the canvas and rename it:

From the Settings tab, create a new linked service to refer to the Azure SQL database from which the stored procedure is executed:

Give the linked service a meaningful name and choose the Azure SQL Database type:

Provide the Server and Database details and credentials, test the connection and click Create:

Back to the Settings tab, select the stored procedure from the drop-down list:

For testing, debug the pipeline to make sure it fails to run:

It fails as expected:

Back to the Azure portal’s home page, create a Logic App:

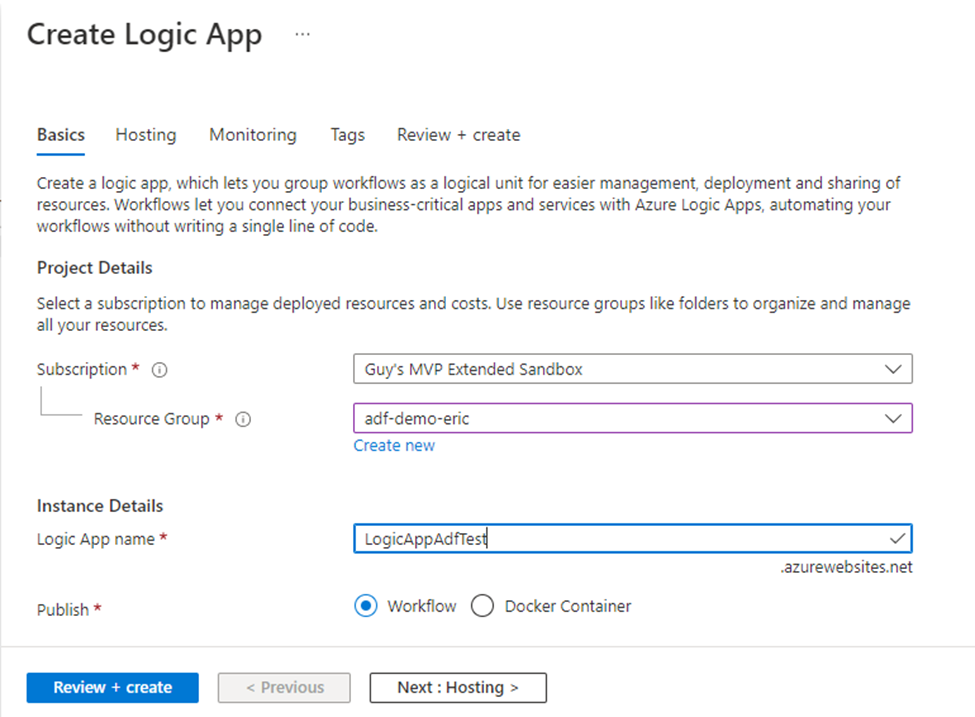
Click the Add button, select an existing resource group (or create a new one), give the Logic App a meaningful name and click “Review + Create”:

Wait for the resource deployment:

Once completed, click “Go to resource”.
You now need to design a workflow for your logic app.
At the resource’s home page, from the leftmost pane, select Workflows:

Click the “Add” button to add a new workflow:

Give it a meaningful name, select a State type and click Create:

Clicking on the newly created workflow will direct you to its overview page.
Under the Developer section of the leftmost pane, select “Designer”:

From the workflow designer, you will be able to trigger an e-mail sending whenever a request is sent to the app following a failure of the ADF pipeline:

You need to configure the first operation so that it triggers the e-mail sending “When a http request is received”: from the right window, start typing “request” in the search bar and select the “When a http request is received” icon:

Click the “Save” button to generate the HTTP POST URL:

Copy the generated URL:

Before going on with the Logic App’s workflow design, you need to go back to your ADF pipeline, to add a Web activity that will trigger the HTTP request in case of failure:
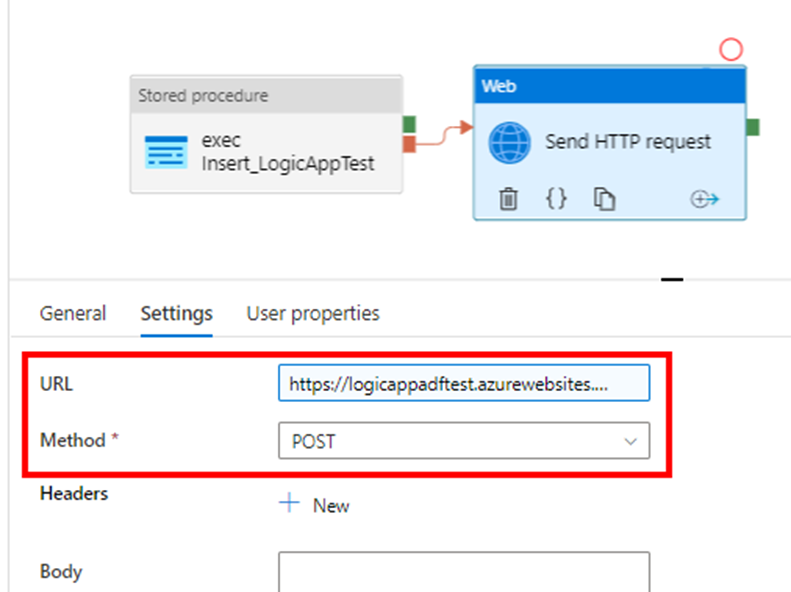
From the activities pane, drag and drop a Web activity to the pipeline, name it accordingly and connect it to the previous activity with a failure output (red arrow):

In the Web activity’s settings tab, paste the URL that was generated in the Logic App workflow and select the POST method:

To be able to have dynamic content within the e-mail you whish to send, you should edit the Web activity’s body (which content will be passed to the logic app in a later step).
To edit the body, select the Add dynamic content option:

The Web activity’s body should be in a JSON format, for example, as following:

You may notice that at this point, the “Subject” and “Message” attributes are empty strings (so you can use the logic app dynamically and from several pipelines) whereas System variables are used for all other objects.
Copy your JSON and, back to the logic app’s workflow designer, paste it into the “Request body JSON Schema”:


Click “Done”
The designer right window should look like the following:

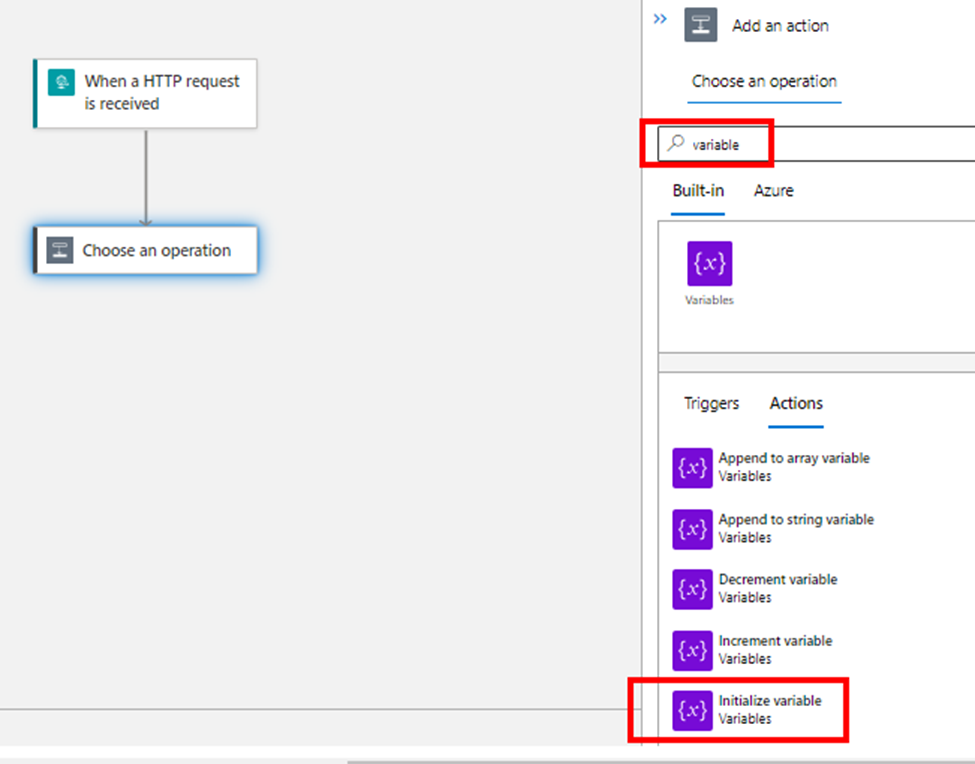
The next step is adding an action to the logic app workflow; before configuring the e-mail sending itself, you may customize a variable to hold the e-mail body \ message dynamically; Type “variable” in the search bar and select the Initialize variable operation:


Enter values for Name and Type, then, add dynamic content and select the “Message” and other objects which are available since you have passed them to the HTTP request using the JSON:

Hit “Save” and add a new step to the workflow:

Them, from the list, choose the “Send an email V2” option:

In case you’re not connected to you e-mail provider account, you will prompt to do so. Otherwise, go on with the e-mail sending setup:

Hit “Save”.
The Logic App workflow is now configured!
Before testing the whole process, go back to your ADF pipeline and provide some values for the “Subject” and “Message” objects in the web activity’s body:

Click Ok and try to debug the ADF pipeline. You should expect it to fail and to receive an e-mail.

Indeed, it fails:

Check if you received an e-mail:

*********************Thanks! *********************

Comentários